Well it was a pretty successful month! I didn't get everything done that I had planned, but I got a lot done and it gave me some motivation! Today I am going to work on the Travel Jar, and will hopefully get it done today, but am not counting on it! It's going to take a bit of research and help from YOU!
So you may be asking yourself what the heck is a travel jar? Well in a date your spouse book that Cameron and I have one of the date ideas is to have a jar full of slips of paper with different destinations on the slips. They are supposed to be with in a half day/day travel distance. It is designed to give you time together pretty uninterrupted (I know Cameron and I always have great talks and get to know each other even better on road trips) and it gives you a chance to get to know the great state in which you live! I am EXTRA excited about this being still somewhat new to Colorado. I want to get to know places like these...
The Sand Dunes... (who knew we had these here?! Besides those that live here of course...)
Pikes Peak..the most visited peak in US (I think?)
Crater Lake...
Maroon Bells. I've heard a lot about it, never been.
Now some of these are physical things that are hikes and what not, which I am going to do a separate jar for. Today's jar is just going to be driving and touristy destinations..get to know the quaint towns around here and the cool things to do, like visit the Unsinkable Molly Brown house. So that's today's goal! I am so excited and if you have been or have heard of anything cool (visit wise or physical activity wise)...send it my way!! I need to know! I can't wait to get to know this great state! Who wouldn't want to stumble across this?
Chapel on the Rock
And stay tuned tomorrow for April Operoseness!!
Wednesday, March 31, 2010
Wednesday, March 24, 2010
Quote Board
I am pretty excited with how this one turned out! And this is going to be a picture heavy post...sorry!! First, here's the vision I have for my headboard:
And yes, we plan on making this soon, lights and all. I'm pretty excited about it! So with this in mind, I wanted something where the picture is (in the picture!). But I decided I wanted a saying, but not vinyl, more substantial for the space. BUT, I didn't want just any saying that everyone has in their room/house. I wanted something more personal than that. So I went through some of my favorite books and got different quotes out of them. Then gave Cameron a list of 6 to choose from, he narrowed it down to 2 and I picked my favorite one!! Just keepin' it real here people! So once I had the quote I just had to find a nice day to get it started! And here we go! :
From scratch: I drew out the rough sketch that I wanted to cut out of my board. (It is a big piece of plywood for those who care to know!)
Ok, so it's cut out, sanded and dinged up. I just took a hammer to it and beat out some chunks of wood. Therapeutic, but didn't give me the exact look I was going for, so I quit early. Hindsight being what it is, I probably would have kept with it a little longer. That being said, I'm still pleased with how it turned out.
Painted it the cream/white color that I have, and finally...the moment you've not even remembered or cared about, but the white is called Innocence by Behr. So there you go. I love it.
After the white dried, I hand sanded it down around some of the edges and in the middle in some places. Wanted to give it a distressed look. Then I put some of the walnut stain I had from the butcher block project and wiped it on then off. This gave me a completely different look than what I was going for (again, trying to keep it real!) but I ended up liking it, so I went with it. I wiped over the entire board, and over a few times in a few places to get it a little darker. Then I wanted to bring in some green/blue so I took some acrylic paint and wiped it on and off again. It's hard to tell in this picture, but it actually turned out pretty cool.
Next step, the words. This was the part I wasn't sure about! So I got the words typed out in Word and eyeballed the size I thought I'd want to use. I think it was 200 or 220, I can't remember. Printed out the words, cut them out and taped them on the board where I wanted the words.
Then I traced over the words and because it was a soft wood it left an indention where I traced. Then I traced over with a marker the indentions.
Then I painted inside the tracings with craft paint and then after that was dry I cleaned up the edges with the same marker I used to outline. Done and done!
The quote says "Gentle, soft dream, nestling in my arms now, you will fly, too, but kiss me before you go". It's from my favorite part of Jane Eyre, at the end when they are reunited. I love the way it turned out, I just need to buy picture hanging hook things and then I can hang it up! And the best part so far it was all free using stuff I had! I tried really hard to be patient and do it right, and I'm glad I did, it was worth the little extra time and patience!
And yes, we plan on making this soon, lights and all. I'm pretty excited about it! So with this in mind, I wanted something where the picture is (in the picture!). But I decided I wanted a saying, but not vinyl, more substantial for the space. BUT, I didn't want just any saying that everyone has in their room/house. I wanted something more personal than that. So I went through some of my favorite books and got different quotes out of them. Then gave Cameron a list of 6 to choose from, he narrowed it down to 2 and I picked my favorite one!! Just keepin' it real here people! So once I had the quote I just had to find a nice day to get it started! And here we go! :
From scratch: I drew out the rough sketch that I wanted to cut out of my board. (It is a big piece of plywood for those who care to know!)
Ok, so it's cut out, sanded and dinged up. I just took a hammer to it and beat out some chunks of wood. Therapeutic, but didn't give me the exact look I was going for, so I quit early. Hindsight being what it is, I probably would have kept with it a little longer. That being said, I'm still pleased with how it turned out.
Painted it the cream/white color that I have, and finally...the moment you've not even remembered or cared about, but the white is called Innocence by Behr. So there you go. I love it.
After the white dried, I hand sanded it down around some of the edges and in the middle in some places. Wanted to give it a distressed look. Then I put some of the walnut stain I had from the butcher block project and wiped it on then off. This gave me a completely different look than what I was going for (again, trying to keep it real!) but I ended up liking it, so I went with it. I wiped over the entire board, and over a few times in a few places to get it a little darker. Then I wanted to bring in some green/blue so I took some acrylic paint and wiped it on and off again. It's hard to tell in this picture, but it actually turned out pretty cool.
Next step, the words. This was the part I wasn't sure about! So I got the words typed out in Word and eyeballed the size I thought I'd want to use. I think it was 200 or 220, I can't remember. Printed out the words, cut them out and taped them on the board where I wanted the words.
Then I traced over the words and because it was a soft wood it left an indention where I traced. Then I traced over with a marker the indentions.
Then I painted inside the tracings with craft paint and then after that was dry I cleaned up the edges with the same marker I used to outline. Done and done!
The quote says "Gentle, soft dream, nestling in my arms now, you will fly, too, but kiss me before you go". It's from my favorite part of Jane Eyre, at the end when they are reunited. I love the way it turned out, I just need to buy picture hanging hook things and then I can hang it up! And the best part so far it was all free using stuff I had! I tried really hard to be patient and do it right, and I'm glad I did, it was worth the little extra time and patience!
Tuesday, March 23, 2010
March Madness
Ok so I tried to work the list on the side, but it was doing crazy things and NOT working. So I deleted it and redid it. I am still doing March Madness, but have decided to take it a little easier this last week or two or however long we have left. So there's the new plan for the rest of the month.
I am currently planning on April madness or some other not lame name for that...any ideas?! I have one other person recruited to do this, who's with me?! I'm going to do things a little more normal next month and only do 2 or so projects a week. I think that's more feasible, plus I have more things I want to work on as well, such as working out and creating more structure for our day. So I think it's going to be a good month! Yay for goals!
And an inspiration picture that is keeping me motivated through this all.
I can't wait for spring! It's so close I can smell it!
Friday, March 19, 2010
Kai loves her!
Thursday, March 18, 2010
Whoo hooo!
Day 17 not successful but day 18 very successful! I finished my taxes today, just have to have Cameron review and we'll submit. Feels good to finally be done. I hate the anxiety, wondering if you're going to get a refund or if you'll have to owe. Seeing the refund/owed number in the corner go up and down as you enter more information. Argh!! So scary. But works out in the end!
On a different note we had to postpone Kai's birthday party :( Yesterday was a beautiful 70 degrees and tomorrow and Saturday we are looking at up to a foot of snow. How does this happen? That's Colorado for you (so I'm told). But I am working on Kai's present which I am REALLY excited for. So that's fun to keep me busy.
And speaking of keeping busy, I have cookies to make and deliver. Peace out!
Tuesday, March 16, 2010
Playing catch...
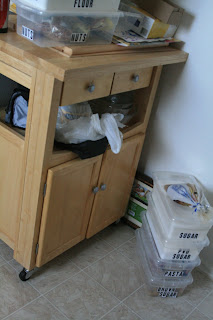
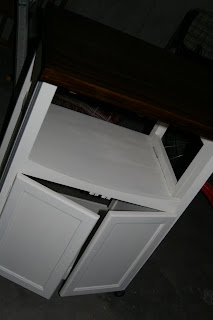
up, that is. Catching up on the march madness! My parents and sister left this morning, it was so great to have them here and be able to participate in Kennedi's blessing! A post and pictures on that to come later! As for the project list, I did fairly well! I organized the kitchen, it feels so good! I didn't take pictures of it, because it's still an ugly kitchen! But here's a picture of the island all completed! It turned out pretty well! Not perfect, but mounds better, and it's new and fun so it makes me happy!
Day 11
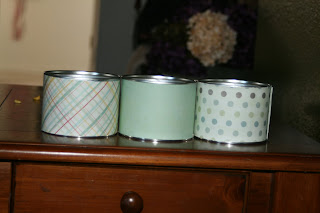
As for the guest bath holder things, here is that. I wanted something to hold things in our guest bath, like q-tips, wash cloths, etc. Well we had a few cans of sample formula laying around (we did use the formula and I just knew the cans were the perfect size for something!). So here are some shots:
Before:
Sort of after:
In it's new home!
So this turned out fun, and it was all free using what I had! So it was a successful project!
Day 12
I also cleaned Kai's room, along with the whole house, and organized some stuff that needed organizing. Nothing fun to take pictures of there!
Day 16
I cleaned. I didn't want to do it, I'm so tired from a fun weekend, but I did it, and now am relaxing in a clean house...man this is a boring post!
Day 17 is left blank, but my goal is to get my taxes done, since that still hasn't gotten done yet. And I am going to change the next couple days as well. I was going to work on Kennedi's crib bedding...but I have to get Kai's birthday party ready. I'm really excited, and it's going to be so fun! And I need to finish (read: start) Kai's birthday present. Here's a teaser...
doesn't that look fun?! Ok, it's so weird I know, but if it turns out how I want it's going to be awesome! So that's the rest of this week. I'll post pictures of the progress!
Wednesday, March 10, 2010
Day 10 anyone?
At least I can be keeping track of the date this way! Today's project was organizing the kitchen. Well I am elbows deep into it and it's just not going to get finished today. Mostly because I took a very LONG break to play with my new MP3 player!! Woot woot! But now I have a lot of music to listen to tomorrow as I finish up the project! Since I don't have a picture to go with this post...here's some inspiration pictures for me...for someday when I have a house!!
I'm loving the white kitchens and natural light...
Image from Southern Living
Image from Deluxe Room
Image from Country Living
Oh the pipe dreams! And in case you're too whited out by these pics, here's an uber fun dining room. Unfortunately Cameron would never go for something like this, but it cheers up the heart a bit, doesn't it?
Tuesday, March 9, 2010
Kid's room
So the hubs and I "decorated" the kids room last night. I use this term loosely because it's not actually decorated and nowhere near where I'd like it to be. But for one, there's only so much you can do in a rental, and two, I have future projects I plan for this room...this was just to make it bearable for me! If you want before pictures the best I have are pictures from the crib post. Here's a few afters.
I got the flowers above the crib from the dollar store and they remove super easy from the wall. I also have jungle animal ones in the kids' bathroom that are SUPER cute. Love them.
The airplane and helicopter Cameron got from a friend of ours who he was helping to move. The guy didn't want them anymore (they were his son's I think?) and offered them to Cameron. Kai has been super into airplanes since Cameron started his new job (working on them) so it's been a fun addition. But like I said, I have big plans!
And here's the little chief himself, insisting on a picture while I was taking them.
What am I going to do with this kid?!
Day 9 in review
Today's project was to stain my chalkboard. I was originally going to stain it the same color/stain as the top of my butcher block.
*side note- the butcher block has dried considerably more today, so I have high hopes for it! I think maybe the moisture in the air and the non-well ventilated garage is not helping matters? But I will give it more time.*
Well upon closer inspection of the chalkboard I realized it could not be stained. So I painted it instead..the same color I painted the bottom of the butcher block. Are we sensing a theme here?! But if it's going to be in the same room it should probably coordinate. And the white/cream looks so nice with the black. So here's the reviews!
Before:
After:
This picture shows the true color better.
It's a really pretty cream...I think it's actually antique white or cottage white...I'd check, but I think we've established that I'm lazy and refuse to go downstairs to check for a name. So if you're dying to know leave me a comment and I'll tell you, otherwise I may someday mention it randomly in another post. Nothing like a little suspense to keep things interesting, eh?
Monday, March 8, 2010
Day 8
Hey I am caught up! Only to fall back behind, I'm sure. But for now, victory! Sweet victory! Today's project is this:
Oh yes, it was this badly cluttered. (Thus my day 10 goal of organizing the kitchen) My brother-in-law had this butcher block island thingy (technical name) that he gave to me...he had heard I'd been wanting one. So I got this and it sat in the corner of my kitchen for a while. And by a while I mean several months. I had originally wanted to paint the bottom and put a slab of marble on the top to become my baking station. (*side note: Why marble you ask? Well marble stays cooler than room temperature, making it perfect for rolling out doughs, etc). Anywho, back to the marble. Well of course there is not a piece of marble I can just buy at HD that would fit this, so it's looking like it'd be a bit more than I want to pay for. So I decided to stain it. Welp...some ideas are good, some are great, and some just don't work out like you hope.
Before:
Here is where I am at now.
Oh sure, it looks good (not the pictures due to poor garage lighting). But the problem is the stain on the top is not drying. It's because it didn't soak into the wood but stayed on top of the finish that was previously on it. I sanded the top before I stained, but apparently not well enough. So now I have a stain on top, which I LOVE the color of, it's just what I wanted but it's tacky and has had almost 48 hours to dry and it hasn't. Here's where I need your help. What do I do? I don't think I can paint over it, but if I can I will...I can't sand it because it gets all gummied up because of the stain, I've tried that. I just don't know what to do. I'm loving the look and the direction it's going, but just don't know how to salvage the top.
What do you think?
Day 7
Taxes. Not done. I hope to finish them...and by finish I mean start, do and finish them, by Friday. Wish me luck.
Day 6: My momma always said...
"Life is like a box of chocolates. You never know what you're gonna get." Oh, wait ...no, that was Forrest Gump's momma. MY momma always said, "If you want something done right, do it yourself...especially when it comes to home improvement or projects." Thus my own toolbox when I moved into my first place, and lots and LOTS of teaching by example :)
Bless my husband's heart he has the best of intentions. He just doesn't always follow through or think about anything after I ask him. So while I had asked and we had planned for 4 weeks now to build Kennedi's crib...well let's just say I had to go back to momma's trusty saying. Saturday morning dawned bright and beautiful, I ran some errands without the kiddo's and had asked the hubs to have her crib at least started by the time I got home. 1 1/2 hours later I come home and let's just say, I got the privilege of opening the box. Ok ok he helped open the box and take out the parts. Then he got himself ready to go to the movies with Kai for a much needed boys day out. He told me he would help me build it when he got home.
This is what he left me with:
This is what he came home to:
That's right baby. Built it by myself. Well not by myself, I had my trusty helper
It was no small feat as some parts of it required a second person to hold up one side while you fastened the other side...but due to much resourcefulness and some sweet jams to boost the spirits I was able to build it in about an hour. And yes I am very proud of myself...even though it was pretty easy!
The mattress is now in and today's project is to redecorate the room. I'll show the results later!
Day 5 Friday Fun
I saw this picture on a blog and thought it was such a fabulous idea!! I loved it and knew that I had to do it.
So this is my version of it. I wanted a fancy frame, but couldn't find one cheap enough that I loved. Then I found one at walmart for $3, and couldn't beat that. Especially since it sort of matches my hideous fridge. Not that the frame is hideous, because it's not. It's actually cute. But matches.
Before:
After:
The woman who did this on the blog I found took the glass and back off of the frame, put magnets on the back of the frame and then took a plastic sheet protector and fitted it to the size of the back of the frame. Then she takes her kids' art/reports, whatever and slips it into the plastic protector.
My frame was a little different and had like a "door" that you can slip the picture into, instead of just taking the back off, so I did not do the plastic protector. I will say that I put on about a million magnets and my frame does not stay up on it's own...thus the ribbon to help hold it up, and the alphabet thing holding it up as well. But I was wondering as I just loaded these pictures, if I take my glass out it might make the frame light enough to stay up on it's own.
Final thoughts...I love the idea. I love the frame. I would recommend getting super strong magnets (or maybe it's my horrible fridge?). But I love it, and someday when I have a really nice fridge I can't wait to get a super fancy frame!
Subscribe to:
Posts (Atom)